My next cake project was for my grandson's first birthday. My daughter comes up with the ideas and between the two of us, we turn the idea into a sweet reality. She wanted a zoo animal theme also featuring a large number one. Our ideas were based loosely on the cake featured on the front of the
2011 Wilton Yearbook.
Several days before we were to assemble the zoo animals we rolled fondant into the heads so that they would have plenty of time to dry.
For the animal bodies my daughter made brownie pops earlier in the day using the
Wilton Brownie Pop Mold. We covered the brownie pops with rolled fondant in colors that match the bodies to the heads. It took some practice to get the fondant positioned just right so that the pops were covered with no folds or thin spots. The last several looked much better than the first ones we did.

Several days later when the fondant had hardened we attached the heads to the bodies using wooden skewers that were cut to size. Then arms and legs were shaped and held in place with some water applied with a food safe paint brush. The water acts as a glue to set the pieces together. Care must be taken not to moisten the fondant too much.

Next we shaped and cut additional features: muzzles, ears, stripes, trunks and tails.
We used
Wilton Foodwriter Markers to add detail to the faces (eyes, noses, mouths, etc.) rather than cut out tiny pieces of fondant. We also decided to simplify the lions mane by cutting out a circle within a circle, using the shell tool for some texture and placing around the lions head.
Here are some closeup shots of the critters:
I think the elephants were our favorite.
Lions
Monkeys
Tigers
After the animals were assembled and set aside to thoroughly dry started to make the large number one that was to sit on the center of our cake. This was made using
Wilton's Number One Cake Mold. We melted yellow candy melts first to fill the first part of the cake mold. After the candy had set, we added a layer of melted green candy melts. I filled an alphabet candy mold with melted green candy melts to spell out Carter's name to add to the number one later.
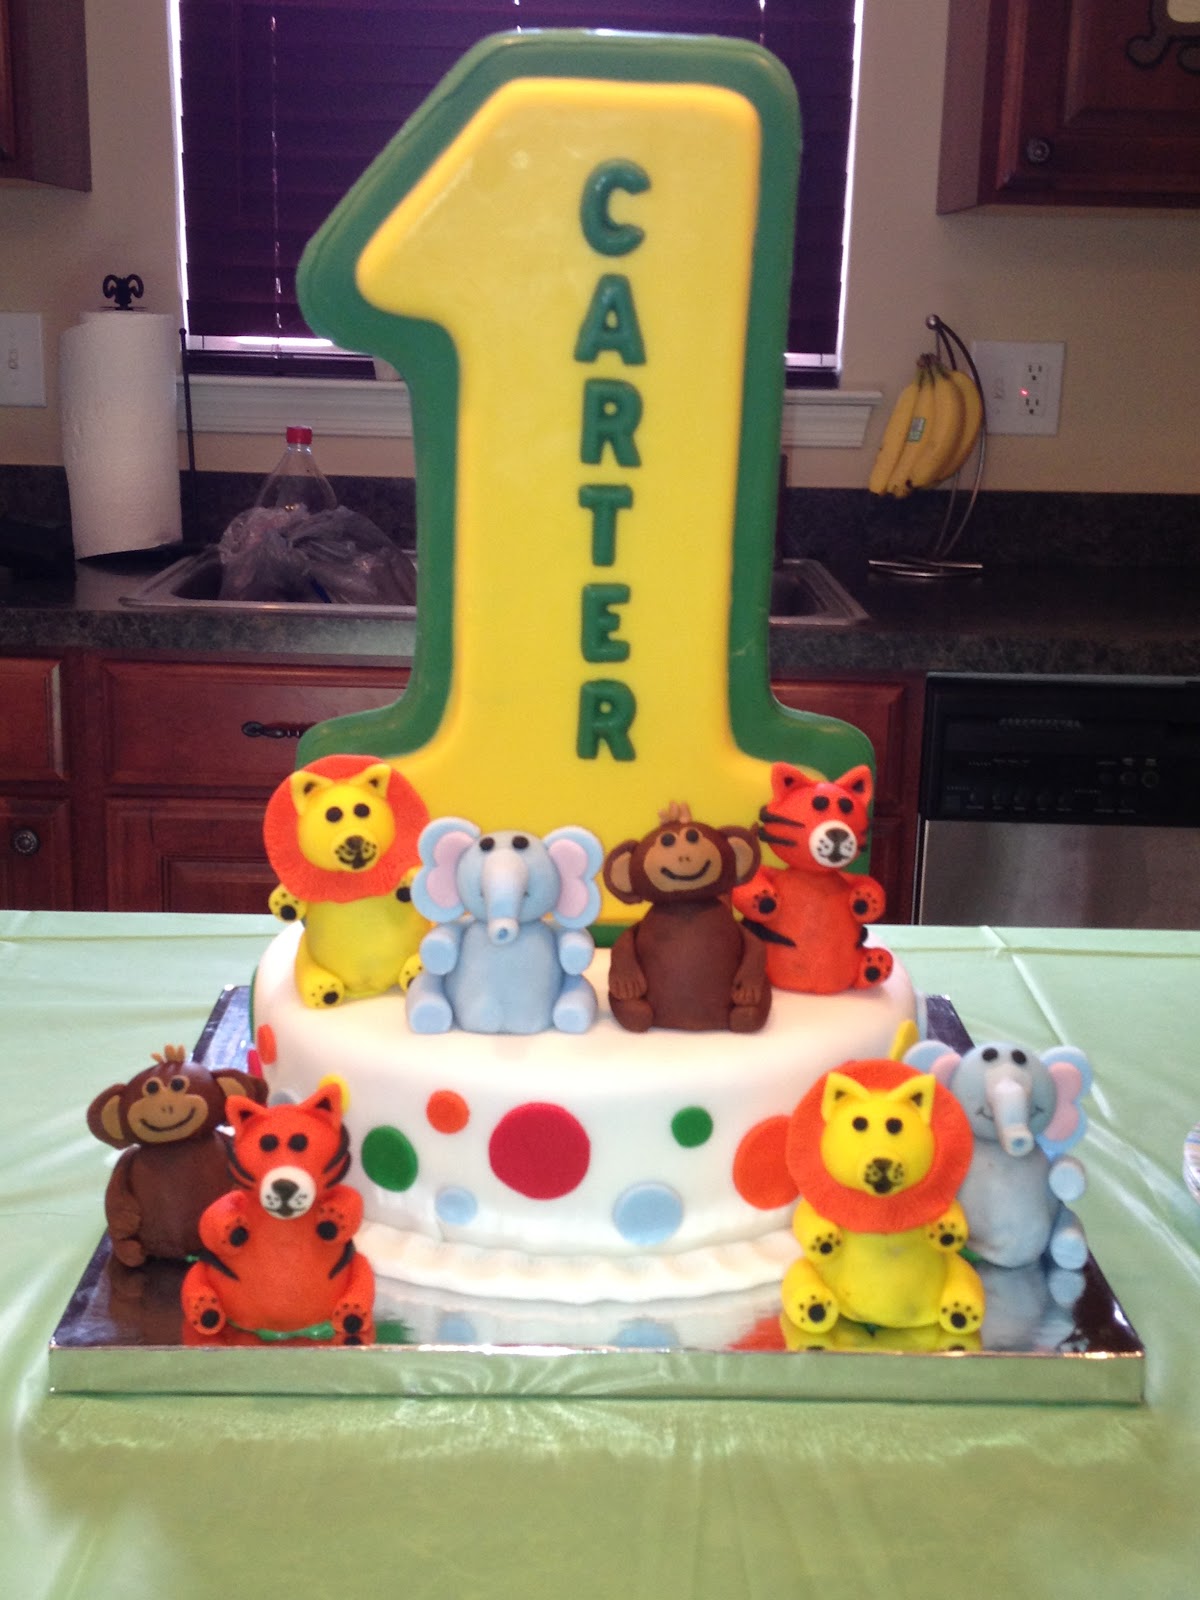
Early on the day of cake assembly, my daughter baked a two layer 10" cake, one layer was chocolate and the other layer yellow cake. I covered the cooled and lightly iced cake with white fondant. I used a long rolled piece of fondant for the border and pressed an embossing tool for a design.
We cut out various sized circles of colored fondant and "glued" to the sides of the cake for a fun polka dot effect that picked up some of the animal colors. We originally were only going to use four animals (one of each kind) but since the brownie pop mold made eight bodies, we used all eight animals, four on the cake and four seated on the sides of the oversized cake board.
I took the Number One out of the mold and with more melted green candy melts, "glued" wooden skewers to the back side. I measured the height of the cake to determine how much skewer needed to go through the cake without showing.
I found in unmolding the candy I had to move quickly so the heat from my hands wouldn't start to melt the candy. Using a layer of parchment paper between my hand and the One helped. I placed the One on a thin cutting board covered with parchment paper and refrigerated for a few minutes to help the skewers set. The letters to spell out Carter's name were "glued" on with more melted green candy melts.
The Number One was placed a little more towards the back of the center of the cake to allow room for placement of the zoo animals.
The grand finale! Ta-da! We did it! Whew! Another "first" that thankfully turned out right.


 Several days later when the fondant had hardened we attached the heads to the bodies using wooden skewers that were cut to size. Then arms and legs were shaped and held in place with some water applied with a food safe paint brush. The water acts as a glue to set the pieces together. Care must be taken not to moisten the fondant too much.


